
Lately I’ve been doing a lot of reading and experimenting with IdentityServer4. I also stumbled upon Swagger for WebAPI documentation and thought it would be fun to try and mix the two. Thankfully it is well supported and pretty easy to wire up. The following will go through the intial setup of the project and wiring up the QuickStart Identity Server to work with the Web Api.
This tutorial will be a two part series:
- Adding Swagger to a WebApi
- Adding IdentityServer to the WebApi
If you just want the sample code, hit up my sample github repo. As a note, I did this in VS 2017 RC so it will be using the .csproj style projects.
First Things First - Giving the API a little swagger
I’m going to assume you can create a WebApi yourself. The default template will do just fine, but I’d advise after creation updating the Nuget Packages and ensure it works before proceeding further.
Now that you have your WebApi, open up the Package Manager Console and type:
Install-Package SwashBuckle.AspNetCore -pre
This will install the Swashbuckle tooling that makes configuring Swagger super easy. You can find out more about Swagger here and the Swashbuckle tooling project here.
With the project installed we simply need to add a few swagger services and middleware in our startup.
Before we test it out, I find it handy to update the launchSettings.json of the WebApi to the swagger documentation. Gives you an instant test harness for validating your Api!
"launchUrl": "http://localhost:5001/swagger"
Now when we launch the application with F5 we’ll pop up the documentation for the default ValueController.
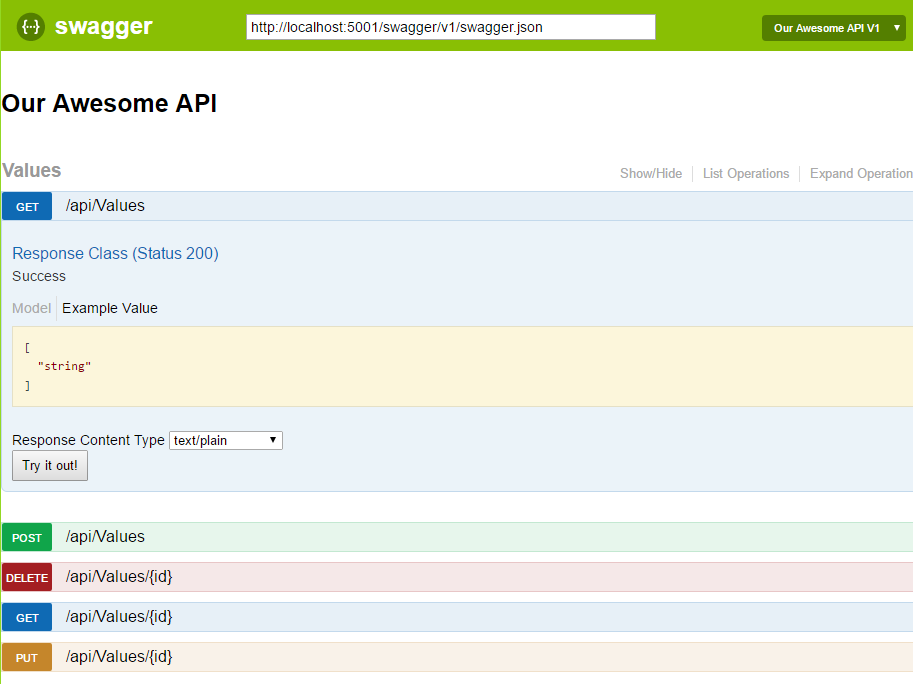
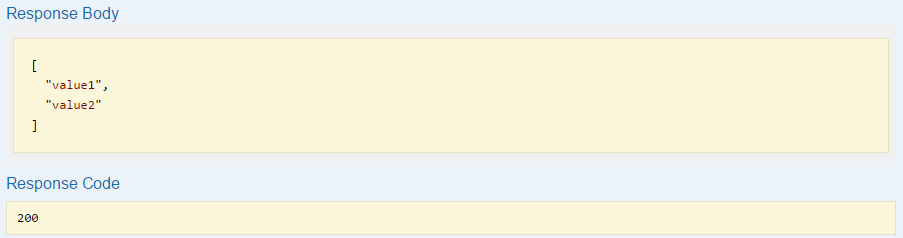
If we click the Try it out! button then we’ll get a response because it is actually using the Api. Not only is this helping document our API, but it is also providing a test harness. While postman has other advantages (like saving requests) this can be a nice replacement when running initial manual tests against the API.
A Few Extra Features
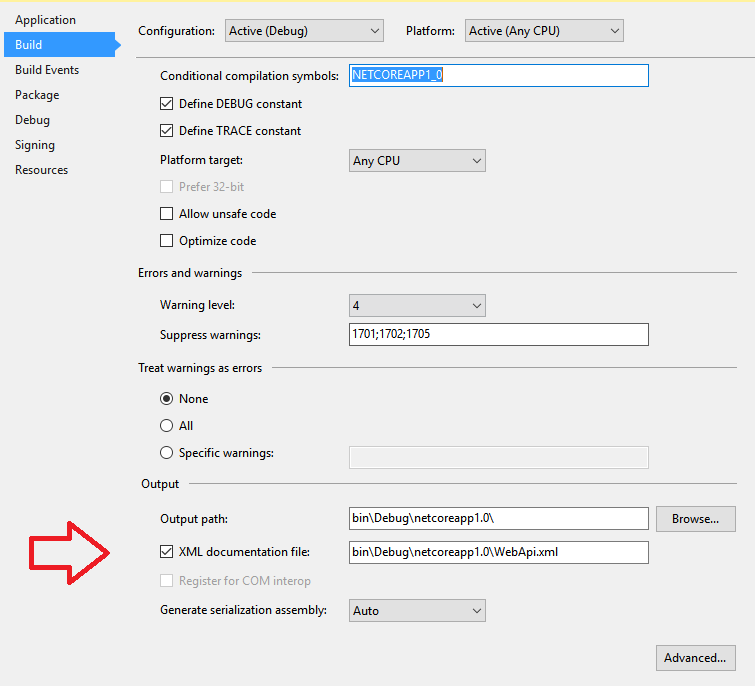
Swagger supports parsing XML Comments and Data Annotations within a Controller which will provide tools to explain intent behind the API. In order to enable the XML commenting there is a little bit of change required. First, enable the XML file generation as part of the build process. This property is found within the Properties of the WebApi project. Be sure to name the xml with the same casing as your project with a .Net Core project as some operating systems are more strict when it comes to casing.
With that flag turned on we now have an XML file to let Swagger know about. We do that by adding some extra options to the services.AddSwaggerGen() method call.
Lets add some XML Comments to the ValuesController Get method.
And if we run now, lets see what that method has for documentation in the Swagger UI.
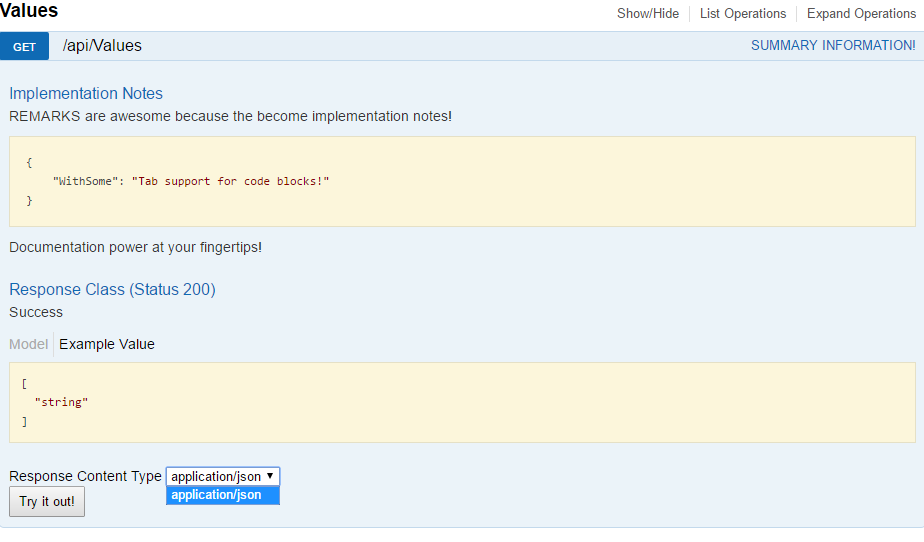
As you can see the summary text goes into the top rail of the expanded section. This way you can see the Summaries when it is condensed to just a list of methods. I really like the support for code blocks in the Remarks section just by tabbing in the remarks section of the XML comment. Powerful stuff for creating robust documentation.
One subtle thing you may not have noticed is that the ResponseContent Type is now scoped to only request “application/json”. This is because of the Produces attribute that I added at the same time is instructing swagger that it is the only option. Previously it would have allowed requests for text/plain, but it still would have returned json. By being explicit in what the method supports Swagger no longer makes a guess. You can put these at the top of the Controller as well to prevent putting it on every action.
So that’s it for now. Next we’ll look at adding the IdentityServer4 QuickStart and configuring it to work with our Api and hooking it into Swagger for easy testing.
